本文最后更新于117 天前
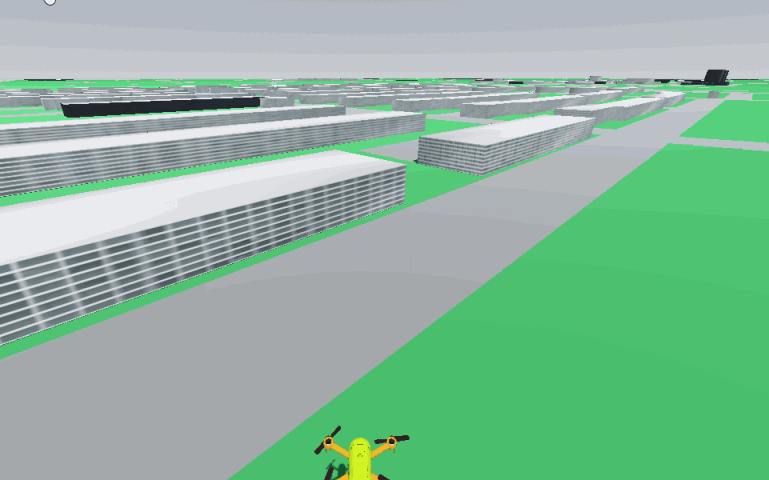
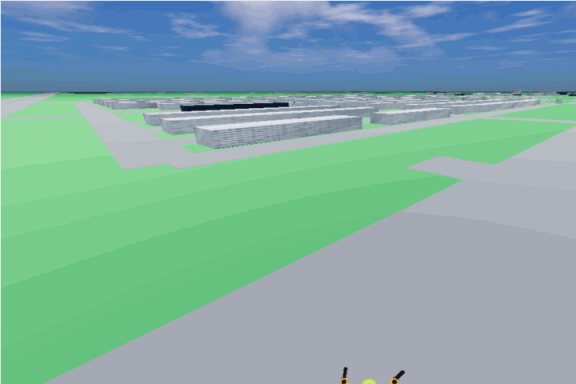
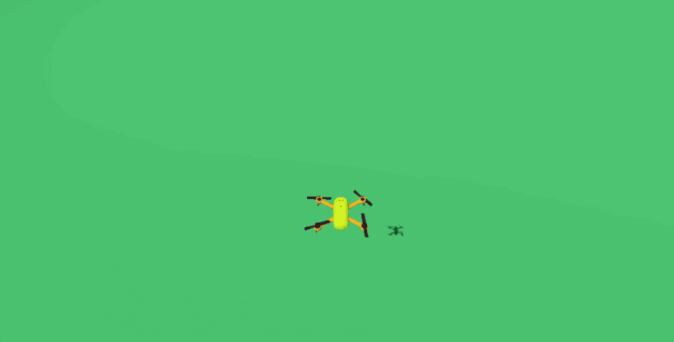
效果预览

新建无人机场景
新建场景,选择3d场景,ctrl + s 保存在scenes 文件夹下


导入无人机模型
无人机模型评论区留言邮箱,发至邮箱哈!
拖动无人机fbx 模型至node3d 节点下

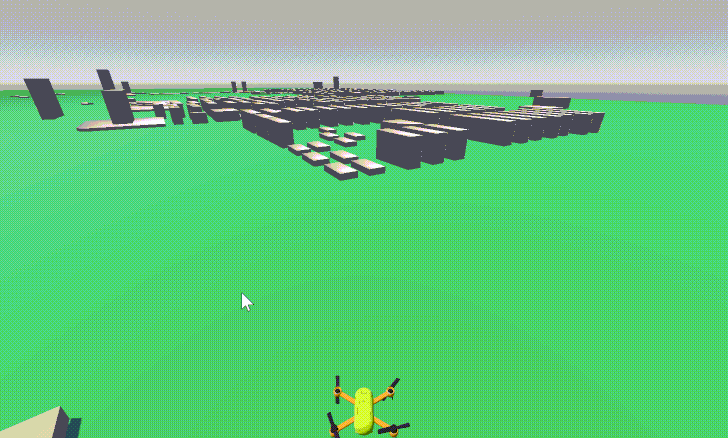
导入后效果

后续无人机飞行过程中我们要控制四个旋翼选装,那么如何控制四个旋翼呢,下面我们介绍一下思路

之后我们可以看到在无人机模型下出现很多子节点,我们挨个点击在右侧我们选中的部分会被框起来

检查节点后我们发现无人机四个旋翼分别是:LimeExp_2/Propeller1_Material_0、LimeExp_2/Propeller2_Material_0、LimeExp_2/Propeller3_Material_0、LimeExp_2/Propeller4_Material_0,所以后续我们直接在脚本中,控制这四个节点绕Y轴的旋转即可。
添加飞控脚本
我们把节点名称改成 Drone,类型改为 CharacterBody3D, 并为该节点添加控制脚本并保存在scripts文件夹下


完整的飞控代码
extends CharacterBody3D

# 物理参数
@export var max_horizontal_speed := 50.0  # 最大水平速度 (m/s)
@export var max_vertical_speed := 10.0    # 最大垂直速度 (m/s)
@export var max_rotation_speed := 1.0     # 最大旋转速度 (rad/s)
@export var horizontal_acceleration := 8.0 # 水平加速度 (m/s²)
@export var horizontal_deceleration := 12.0 # 水平减速度 (m/s²)
@export var vertical_acceleration := 5.0  # 垂直加速度 (m/s²)
@export var vertical_deceleration := 3.0  # 垂直减速度 (m/s²)
@export var rotation_acceleration := 2.0  # 旋转加速度 (rad/s²)
@export var rotation_deceleration := 4.0  # 旋转减速度 (rad/s²)

# 状态变量
var target_horizontal_velocity := Vector3.ZERO
var target_vertical_velocity := 0.0
var current_vertical_velocity := 0.0  # 新增:当前垂直速度
var target_rotation_speed := 0.0
var current_rotation_speed := 0.0
var last_input_dir := Vector2.ZERO
var input_changed := false

func _ready():
    # 设置物理更新优先级
    set_physics_process_priority(1)

func _physics_process(delta):

    handle_input()

    apply_physics(delta)
    move_and_slide()

func handle_input():
    # 获取水平移动输入
    var input_dir = Input.get_vector("move_left", "move_right", "move_forward", "move_back")

    # 修复方向问题:前后左右方向反转
    var direction_vector = Vector3(-input_dir.x, 0, -input_dir.y)

    # 计算目标水平速度(基于当前朝向)
    target_horizontal_velocity = (transform.basis * direction_vector) * max_horizontal_speed

    # 获取垂直输入 - 只设置目标垂直速度
    target_vertical_velocity = 0.0
    if Input.is_action_pressed("ascend"):
        target_vertical_velocity = max_vertical_speed
    elif Input.is_action_pressed("descend"):
        target_vertical_velocity = -max_vertical_speed

    # 获取旋转输入
    target_rotation_speed = 0.0
    if Input.is_action_pressed("rotate_left"):
        target_rotation_speed = max_rotation_speed
    elif Input.is_action_pressed("rotate_right"):
        target_rotation_speed = -max_rotation_speed

func apply_physics(delta):
    # 旋转控制
    if abs(target_rotation_speed) > 0:
        # 加速到目标旋转速度
        current_rotation_speed = move_toward(
            current_rotation_speed,
            target_rotation_speed,
            rotation_acceleration * delta
        )
    else:
        # 减速到零
        current_rotation_speed = move_toward(
            current_rotation_speed,
            0.0,
            rotation_deceleration * delta
        )

    # 应用旋转
    if abs(current_rotation_speed) > 0.001:
        rotate_y(current_rotation_speed * delta)

    # 处理水平移动
    var horizontal_velocity = Vector2(velocity.x, velocity.z)
    var target_horizontal_velocity_2d = Vector2(target_horizontal_velocity.x, target_horizontal_velocity.z)

    if target_horizontal_velocity_2d.length_squared() > 0.1:
        # 有输入时加速
        horizontal_velocity = horizontal_velocity.move_toward(
            target_horizontal_velocity_2d,
            horizontal_acceleration * delta
        )
    else:
        # 没有输入时减速
        horizontal_velocity = horizontal_velocity.move_toward(
            Vector2.ZERO,
            horizontal_deceleration * delta
        )

    # 改进的垂直移动控制 - 使用单独的当前垂直速度变量
    if abs(target_vertical_velocity) > 0.1:
        # 有输入时加速到目标速度
        current_vertical_velocity = move_toward(
            current_vertical_velocity,
            target_vertical_velocity,
            vertical_acceleration * delta
        )
    else:
        # 没有输入时减速到悬停
        current_vertical_velocity = move_toward(
            current_vertical_velocity,
            0.0,
            vertical_deceleration * delta
        )

    # 更新速度向量
    velocity.x = horizontal_velocity.x
    velocity.y = current_vertical_velocity  # 使用当前垂直速度
    velocity.z = horizontal_velocity.y
设置相机跟随
我们删除主场景里面的Camera,然后在drone 场景中添加Camera3D节点
删除相机后的主场景

为drone 场景添加Camera3D节点


为相机添加跟随控制脚本取名为:camera.gd
extends Camera3D

# 跟随目标(在编辑器拖拽玩家节点到此属性)
@export var target : Node3D

# 相机参数
@export var distance := 3
@export var height := 5
@export var follow_speed := 5.0
@export var look_ahead := 2

# 垂直旋转相关变量
var vertical_rotation := 0.0
var vertical_rotation_limit := deg_to_rad(45)  # 限制俯仰角度
var rotation_speed := 2.0  # 旋转速度

func _ready():
    # 确保相机不继承父节点旋转
    set_as_top_level(true)

func _physics_process(delta):
    if not target:
        print("没有观察对象")
        return

    # 处理垂直旋转输入
    handle_vertical_rotation(delta)

    # 计算目标位置(目标后方 + 高度)
    var target_position = target.global_position - target.global_transform.basis.z * distance
    target_position.y = target.global_position.y + height

    # 平滑移动相机
    global_position = global_position.lerp(target_position, follow_speed * delta)

    # 计算注视点(玩家前方偏移)
    var look_target = target.global_position + target.global_transform.basis.z * look_ahead
    look_target.y = target.global_position.y

    # 应用垂直旋转后的注视点
    look_target.y += sin(vertical_rotation) * look_ahead * 2

    # 平滑注视目标
    look_at(look_target, Vector3.UP)

# 处理垂直旋转输入
func handle_vertical_rotation(delta):
    var vertical_input = 0.0

    # 垂直旋转输入(前后俯仰)
    if Input.is_action_pressed("rotate_up"):
        vertical_input += 1.0
    if Input.is_action_pressed("rotate_down"):
        vertical_input -= 1.0

    # 垂直旋转(绕X轴)
    if vertical_input != 0:
        # 计算新的旋转角度并限制范围
        var new_rotation = vertical_rotation + vertical_input * rotation_speed * delta
        vertical_rotation = clamp(new_rotation, -vertical_rotation_limit, vertical_rotation_limit)
为摄像机指定观察对象

实例化无人机到主场景中
func create_drone():
    var drone_scene = preload("res://scenes/drone.tscn")
    var drone = drone_scene.instantiate()
    add_child(drone)
    drone.position = Vector3(0,5,0)
输入映射
在 Camera 中我们 添加了视角 rotate_up 和 rotate_down 的控制。控制视角的上下旋转。
在 drone 中 我们添加了 move_left, move_right, move_forward, move_back, ascend, descend的控制。
下面我们来添加键位映射。


弹出的窗口可以监听按键,我们只需按要绑定的按键即可
我绑定 move_left 为 A

同样添加其他映射如下

运行游戏此时你会发现无人机已经可以随意控制啦
无人机旋翼旋转
# 提升旋转速度(单位:度/秒)
var wing_rotation_speed: float = 1080.0  # 从360提升到1080

func flying(delta):
    var wings = [
        $LimeExp_2/Propeller1_Material_0,
        $LimeExp_2/Propeller2_Material_0,
        $LimeExp_2/Propeller3_Material_0,
        $LimeExp_2/Propeller4_Material_0
    ]
    var rotation_amount = deg_to_rad(wing_rotation_speed * delta)

    for wing in wings:
        if wing:
            # 使用更高效的旋转方法
            wing.rotation.y += rotation_amount